WordPress Content Automation Starts with the Article Format and Folder Structure
WordPress content automation describes the idea of letting software handle everything that happens after the writing is done. The tool works with plain files in a folder: a text file with a title, the article itself and a few optional details is all it needs. From there it takes care of the upload, the images, the categories and the publication. It is well suited to teams and solo writers who produce content in a fixed format and want a dependable path from finished file to live page.

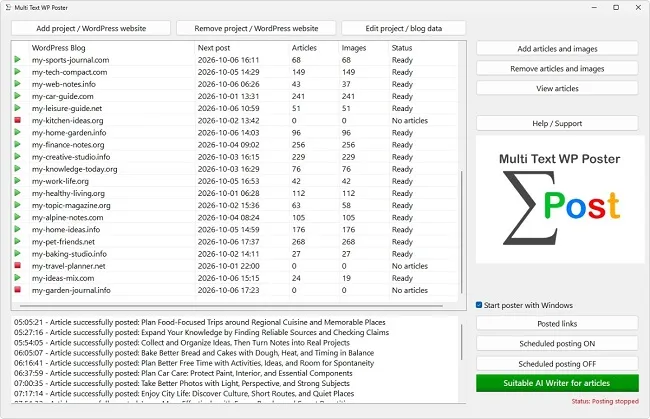
WordPress content automation sounds technical, but at its core it is a matter of order. An automaton can only process what it understands. That is why every WordPress content automation starts with a fixed format: where does the title go, where does the text begin, where do the images live? If you solve that cleanly, you can feed in any number of texts from any sources later. In Multi Text WP Poster this format is called POSTFORMAT. It is simpler than the name suggests and can be written by hand in any text editor.
Why a Fixed Format Carries WordPress Content Automation
A person entering a post in the WordPress backend knows intuitively what belongs where. They recognize the title by its size, the text by its length and the tags by their shape. A program has no such instinct. It needs markers that say unambiguously: the title starts here, the text starts here.
This has an advantage for WordPress content automation that is easily overlooked. Because the format is so clearly defined, your texts are independent of where they were created. An article you wrote yourself looks the same to the automaton as one from a copywriter, from a writing program or from another tool. In WordPress content automation you can mix sources without anything changing in operation.
The second advantage of WordPress content automation concerns troubleshooting. If something wrong shows up on the blog, you find the cause in the file, in plain text. You open the article, see the markers and recognize at once whether the title is in the right field or whether the description is missing. In the backend you would have to click through several input screens to find that out. A text file, by contrast, can be checked, corrected and put back in seconds, without anything in your site's database needing to be touched.
The Fields of an Article File at a Glance
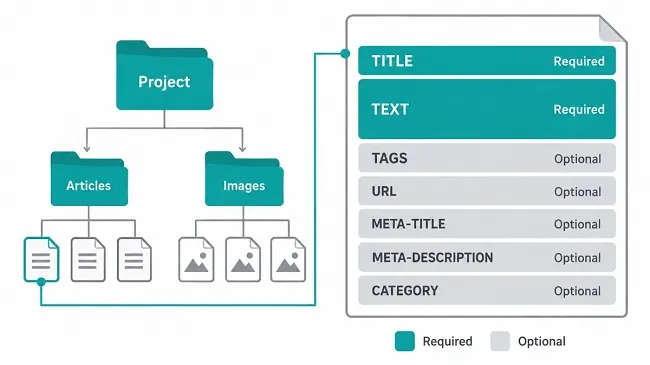
For WordPress content automation, an article file consists of several named sections. Two of them are mandatory, the rest may be missing. The following table shows what exists in WordPress content automation and what belongs in each. How the individual entries take effect is explained in more detail in the articles on categories, images and search engine data.
| Section | Required | Content |
|---|
| TITLE (also TITEL) | yes | headline of the post on one line |
| TEXT | yes | the actual article as HTML |
| TAGS | no | keywords, separated by commas |
| URL | no | desired short address (slug) of the post |
| META-TITLE | no | title for search engines |
| META-DESCRIPTION | no | description for search engines |
| CATEGORY | no | number of the WordPress category |
All sections except TEXT take exactly one line. If a field contains several lines, the program evaluates the first one that is not empty. Only the TEXT section may span any number of lines. It runs to the next marker section or to the end of the file.
The smallest possible file for WordPress content automation therefore consists of just four lines: the marker [TITLE], the headline, the marker [TEXT] and the first paragraph. Everything else is a bonus. That is reassuring especially for beginners, because you do not need to know all the fields to publish your first post. You add the optional sections only when you really need them, and their order among themselves is up to you.
Two Spellings for the Same Markers
WordPress content automation recognizes the sections in two ways. In the first, the name stands in square brackets on its own line, with the content below it. The title becomes a line with [TITLE], followed by a line with the headline. This variant is also what the program produces itself when it creates a file, for example when pasting text from the clipboard.
In the second, the name stands without brackets, followed by a separator line of at least 20 hyphens. That is permitted as well, and WordPress content automation even understands a mixed form of bracket and separator line. Upper and lower case do not matter for the names, and blank lines before or after the markers are skipped. For TITLE, the German word TITEL may also be used.
Why two variants in WordPress content automation? Because texts come from different sources. Some writing tools deliver one form, some the other. You do not have to decide, only stick to one style within a single file. For new files, the bracket spelling is recommended, because it is shorter and catches the eye immediately when skimming. The safest approach is to put the TITLE section before the TEXT section. When pasting from the clipboard, WordPress content automation explicitly points out if the order is wrong.
The Text Part as HTML That WordPress Understands
Everything after the TEXT marker is handed to WordPress as article content. HTML is expected. Headings, paragraphs, lists and tables are set with the usual tags. The program ignores blank lines at the start of the section, and blank lines at the end as well.
The title does not additionally belong in the text as a main heading. WordPress displays the post title above the article anyway, so a second top-level heading would be a duplicate. Begin the text part with a paragraph or with a second-level subheading instead and structure from there. That is cleaner and matches what your theme expects later.
Keep the HTML in your WordPress content automation as plain as possible. Avoid inline formatting, classes and wrapping containers, because appearance and layout are determined by your theme. A post made of headings, paragraphs, lists, tables and the occasional bold text adapts to any design. If you work with fixed colors, font sizes or widths instead, you risk the article suddenly falling out of line on the site. You also do not have to write the image in the article into the text. If you have assigned one to the article, WordPress content automation adds it at a suitable spot when posting.
File Types, Character Set and File Names
As article files, WordPress content automation recognizes files with the extensions .html, .htm and .txt. During import you can additionally use Word documents in .docx format, which the program converts to HTML before adding them. For the character set, UTF-8 with or without a marker at the start of the file is possible, as is an older ANSI encoding. Umlauts and special characters are preserved. Save new files as UTF-8 if you can, because that is the standard all of today's editors handle.
For the file name, WordPress content automation expects a fixed pattern on import: a four-digit running number, then the word WORDPRESSBLOG and finally a freely chosen name, for example 0001-WORDPRESSBLOG-repotting-guide.html. The number helps you keep track of the order. The free part of the name should be short and descriptive. Also important: files whose name begins with #-USED-#- are regarded by the program as done and are no longer added to the stock. It sets this marker itself when posting, so you should not assign it by hand.
The Folder Structure of a Project
Each project in WordPress content automation gets its own folder. Articles and images lie side by side in it, with no subfolders for texts or images. An image belongs to an article when it carries the same base name and ends with _IMG1 for the featured image or _IMG2 for the image in the article. So 0001-WORDPRESSBLOG-repotting-guide_IMG1.jpg matches 0001-WORDPRESSBLOG-repotting-guide.html.
In addition, WordPress content automation creates two small control files in the folder. One contains the project's access data and settings, the other the next date. You should not edit or delete these files, because otherwise the project loses its settings or its schedule. Make changes via "Edit project / blog data" instead.
Via the "Open folder with articles and projects" button in the help window you get directly to the main folder of all projects. From there you keep track of which texts are still waiting and which are already marked. If you look after many projects, this saves you searching the file system. A cleanly kept folder is also the simplest data backup for WordPress content automation: copy it, and you have the texts, images and settings of a project in one place.
A Checklist from Finished Text to the Right File
If you feed WordPress content automation with texts from third parties, you can pass on the following list as a specification. It describes what a text needs for a smooth import.
- The file name begins with a four-digit number and ends in .html, .htm or .txt.
- The title stands under the TITLE marker and fills exactly one line.
- Tags stand, separated by commas, under TAGS. This section may be missing.
- The article follows as HTML under TEXT, without a main heading, without classes and without formatting.
- The file is saved as UTF-8.
- Additional details such as URL or meta description each stand on one line under the matching name.
On import, WordPress content automation checks the format. If the title or text marker is missing, or one of the two sections is empty, it reports "Invalid POSTFORMAT:" and names what is missing. The article is then not accepted; you can correct it and try again. A faulty text therefore never gets into the stock of your WordPress content automation. Check larger deliveries in one go before you load them, and give feedback to the sender if the same marker is missing again and again.
|



